
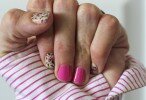
DIY gel nails at home has become such a fun money and time saver for me! As much as I love going to the salon, it is rather a luxury that we can’t fit into our budget at the present. But that won’t stop me from looking like I have been to the salon ![]()
So before Christmas, a little bird whispered to Benjamin about buying some gel nail supplies and maybe he needed to check his Amazon cart. And to my delight, Christmas morning, I opened up a delightful gel set hehe! Thank you baby!
Before I placed these certain items in our Amazon shopping cart, I read many reviews and found many opinions. And from all of that, I decided on the lamp, and the brand.
Longing to have my nails look pretty and taking the time to paint them, seems to be more of a waste of time, due to nail polish chipping as soon as my hands touch the dishwater. And once my nail polish has chipped, I tend to procrastinate removing the chipped polish!
The price of the gel set would be the same as going to the salon just two times!
If you are someone who loves to change up your regular polish every few days, then I doubt you will like having gel polished nails. My nails last roughly up to ten days and removing the polish for a different color, isn’t as easy as it is with regular nail polish.
But if you are like me, and don’t have the time to wear regular nail polish, but still want your nails to look nice. Then gel polish may work for you like it has me!

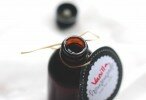
To get started you will need *optional* pH Bond which is a liquid buffer for the nail.
*Scroll down for the the links to these items and the tutorial*

Foundation.

And Top It Off, which is what gives the manicure that lovely shine.
I couldn’t find the exact same kit that I found, which is practically identical.

I bought this at Target, but you can find it online or at Sally’s as well. I think it may be just a little too sheer for me, but I do like it.

I researched all the different lamps and found from reviews, that seemed of better quality, yet wasn’t extremely expensive.

*Step 1
Push back the cuticles and trim. Removing the cuticle is important, because you don’t want any excess polish and shine to show up on the cuticles, which may jeopardize the polish for the whole nail and induce lifting. So best to trim off the cuticles.

*Step 2
Apply a thin coat of the pH Bond. If you are not using the Gelish brand and there is no pH bond, don’t be concerned. The pH bond works as a buffing. So if you like, you can just buff your nails down with a buffer.
The lamp is not needed with the pH bond.

*Step 3 *Important*
The Foundation coat needs to be very thin when applied. Now on this brand, the brush seems to sop with the coating, so it makes it a little difficult to apply a thin amount. With practice I have been able to get the hang of it. Cure for two minutes under the lamp.

*Step 4 (The fun part)
Apply a thin coat of your gelish nail polish. Cure for 2 minutes. If you apply more than 1 coat you will need to cure every time. So I applied three coats and cured three times, because the color didn’t quite show up as much as I wanted. After the third coat I was pleased. Your polish will be a little tacky, don’t worry, just go on to step 5.
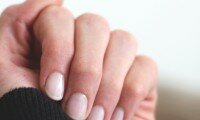
I chose a Sally Hanson color while I was at Target one day, I love that this color makes my hands look clean and elegant. Next time I will choose something not so sheer, so I wont have to apply three coats.

*Step 5
Apply a very thin amount of the Top It Off and cure for two minutes. The Top it Off is the final coating that adds the lovely shine to the nails.

* Step 6
At this point you are all finished, but your nails will still be a bit tacky. Take some alcohol and soak a cotton ball. Wipe each nail down with the wet cotton ball and you are finished!
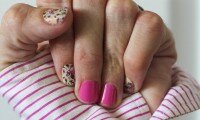
My shock is that I don’t have to worry about smudging my nails when I put my things away! That alone makes me grin and laugh hehehe!
It has taken me several manicures in getting the flawless gel look. But anyone else around me probably wouldn’t know that I had glitched them up my first try. They still looked so lovely. So don’t worry yourself if the first few attempts don’t turn out perfect.
After I do my nails I have learned and noticed why it is important to do light coatings of each application. Lets just say, my manicure lasts a lot longer when I am more frugal with the applications ![]()

The reason I love doing a Gel Nail manicure from home, is of course the cost and savings. But the main reason is how beautiful my nails look all the time! Even if my hands have been washing dishes all day long. They still look so pretty and shiny.
I plan on doing a post soon about removing your gel nail polish. It is not as hard as you may think!
Stay tuned!









Hey! Thats not fair. I want this for my christmas present now! I think I will come over and use it instead ha ha ha!
I can’t get over how lovely your nails look Elizabeth! They look so clean and kept up. I am so glad you did this tutorial because I have no idea how to do gel nails. I was very curious.
Love you so much!
Your sister
~ Marie
Good Morning, I must say your nails look great! I have always loved the Gel Nails myself! It was they they had to remove them that was very hard on me. Someone told me to soak them in acetone for 20 min. I became so sick from the chemical reaction. Please Email me as to how you will remove it. I want to go out now and buy what you have:)
Blessings, Roxy
Your nails looks so beautiful Sweetie. I love the idea of it and it is so much less expensive doing it your way. I have had them done at the salon and loved having them; would love to get one of these and be able to do this all of the time. Love you and miss you and wish you were here.
Mom
Your nails look beautiful darling, just beautiful!
I’m not a big nail painter, because as you said they chip off from doing chores and then they look not so pretty anymore. So, I stick to nothing and that seems to work for me. HA!
I do like to paint my toenails however… they need all the pretty they can get.
I hope you are having a great day!
Take Care,
Amy
I want you to do my nails again…
I would in a heart beat Mom!